
Training for a hike requires 12 weeks of progressive conditioning, starting with short 1-2 hour hikes while carrying a light daypack and building to 6-8 hour treks at your target pack weight. The goal is simple: prepare your cardiovascular system, strengthen hiking-specific muscles, and condition your body to handle extended days on the trail without injury or exhaustion.
Most hikers make the mistake of thinking general fitness translates directly to trail-ready conditioning. It doesn’t. Running a marathon won’t prepare you for sustained elevation gain with 30 pounds on your back, and gym sessions alone won’t replicate the eccentric muscle loading that happens on long descents. You need a targeted plan that mirrors the demands of your specific trip.
The training frequency matters as much as intensity. Three sessions per week gives your body enough stimulus to adapt while allowing recovery time between efforts. During those 12 weeks, you’ll gradually increase both duration and load, test your gear under real conditions, and break in the boots that will carry you through thousands of steps. This isn’t just about avoiding sore muscles. Proper preparation reduces your injury risk, makes the experience more enjoyable, and ensures you can handle unexpected challenges like route changes or weather delays.
The type of trip determines your training load. Backpacking expeditions call for working up to a 30-pound pack, while day hikes and other adventures need 10-20 pounds max. Both require the same progressive approach, just different end weights. When combined with solid hiking trip planning this training framework prepares you for everything from weekend scrambles to multi-day wilderness treks.
What You Need Before You Start Training

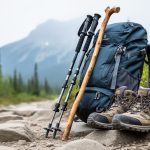
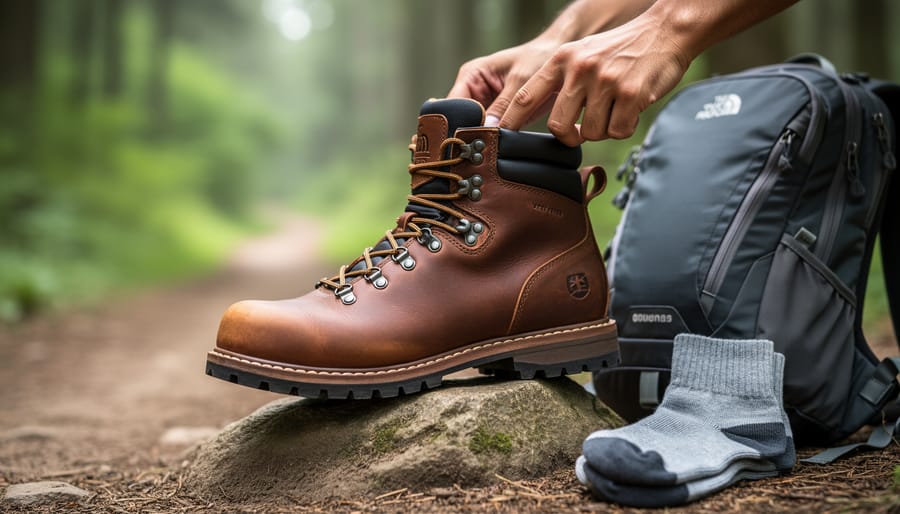
You’ll waste your training time and risk injury if you don’t have the right gear before your first workout. Start by purchasing the exact hiking boots you plan to wear on your trip, breaking them in during training is critical because new boots cause blisters and hot spots that can ruin your hike. Choose boots with ankle support for rough terrain or lighter trail shoes for well-maintained paths, but commit to one pair and wear them for every training session.
Your training backpack needs adjustable weight capacity so you can progress gradually. Start with a daypack that comfortably holds 10-15 pounds, then add weight as your fitness improves. If you’re training for a backpacking trip, you’ll eventually carry 30 pounds; for day hikes and other trip types, build toward 10-20 pounds. Use water bottles, sandbags, or weighted plates to adjust the load, don’t just stuff your pack with random items that shift around and throw off your balance.
Here’s your essential training gear checklist:
- Hiking boots or trail shoes (the exact pair for your trip), prevents blisters and identifies fit problems early
- Adjustable backpack with hip belt, distributes weight properly and allows gradual load increases
- Moisture-wicking base layers and weather-appropriate outer layers, trains you to manage temperature regulation
- Hydration system (bottles or reservoir), establishes your fluid intake needs under load
- Trekking poles (if using on your trip), builds the muscle memory and technique you’ll need
Optional but helpful: a fitness tracker or smartphone app to monitor heart rate, distance, and elevation gain. These tools help you measure progress and maintain appropriate training intensity, but they’re not mandatory if you can gauge effort by how you feel.
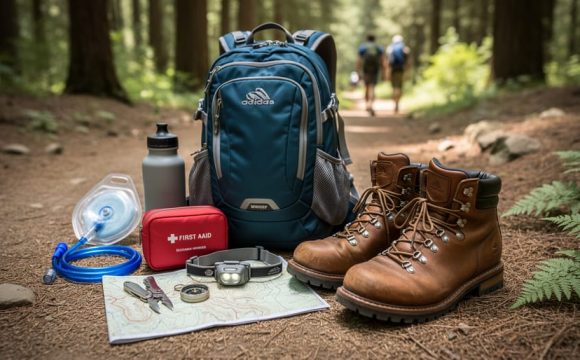
You don’t need specialized hiking essentials like navigation tools or emergency gear for neighborhood training walks, but add them for longer trail sessions to practice carrying and accessing them. The goal is to train with everything you’ll actually use, so your body adapts to the real weight and your gear becomes familiar before you hit the backcountry.
Know Your Limits: Safety Considerations and Warning Signs

Before you lace up your boots and hit the trail, understand that a smart training program respects your body’s signals and builds gradually. If you have any pre-existing health conditions, haven’t exercised regularly in over six months, are over 40 and starting a new fitness routine, or have a history of heart disease, joint problems, or respiratory issues, consult your physician before beginning this program. A quick checkup now beats a medical emergency on the mountain.
Learning to distinguish normal training fatigue from potential injury is critical. Muscle soreness that spreads across a muscle group, peaks 24-48 hours after exercise, and improves with gentle movement is normal. Sharp, localized pain that starts suddenly during activity, prevents you from completing your normal range of motion, or worsens over several days signals a problem that needs rest or professional evaluation.
Proper hydration and nutrition aren’t negotiable during training. Drink water consistently throughout the day, not just during workouts, and carry at least one liter for every two hours of hiking. Fuel your body with a mix of carbohydrates and protein within an hour after training sessions to support recovery. Familiarize yourself with basic safety tips and pack a quality hiking first aid kit even on training hikes.
Parks Canada recommends you hike with others rather than solo, which applies equally to training sessions. A partner notices when you’re pushing too hard, provides motivation on tough days, and offers immediate help if something goes wrong.
The 12-Week Progressive Training Plan
Weeks 1-4: Building Your Foundation
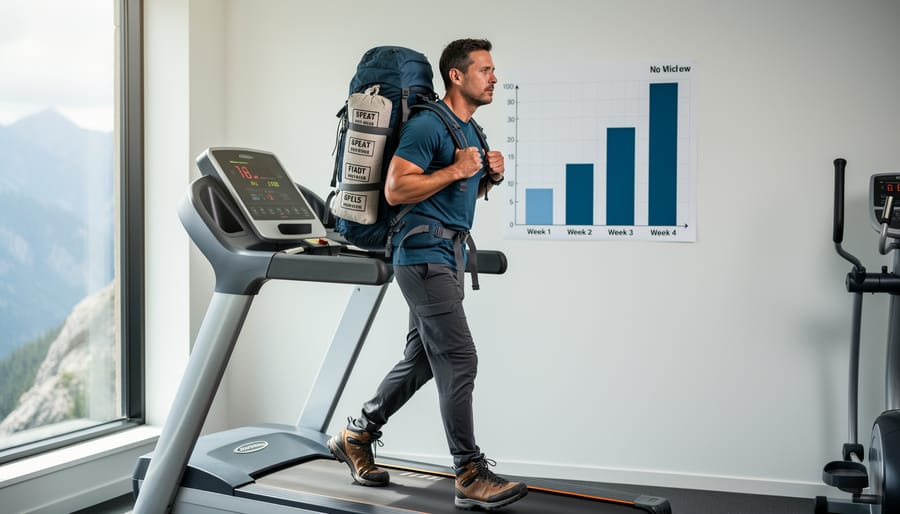
Your first month establishes the foundation every successful hiking trip depends on. Think of these four weeks as a proving ground where you’ll build basic endurance, break in your boots, and develop the training rhythm that carries through the entire 12-week plan.
Start with sessions of one to two hours, three to four days per week. If you’re hiking actual trails, choose relatively flat or gently rolling terrain, save the steep climbs for later. If weather or access limits outdoor options, treadmill walking at an incline, stair climbing, or cycling work perfectly as substitutes. The key is consistent cardiovascular effort, not specific terrain.
Load your pack with 10 to 15 pounds from day one. Use water bottles, sand bags, or camping gear you already own. This weight feels manageable but still conditions your shoulders, hips, and core for carrying loads. Wear the exact boots you’ll use on your trip during every training session, even if they’re brand new. Those first weeks prevent the blisters and hot spots that ruin actual hiking trips.
Here’s how the month should progress:
- Week 1: Three sessions of 60-75 minutes with 10 pounds, flat to gentle terrain
- Week 2: Three to four sessions of 75-90 minutes with 10-12 pounds, add gentle hills
- Week 3: Four sessions of 90 minutes with 12-15 pounds, steeper but short inclines
- Week 4: Four sessions of 90-120 minutes with 15 pounds, mix of terrain types
Monitor intensity by the talk test: you should maintain a conversation but feel slightly breathless. If you’re gasping for air, slow down. If you’re chatting effortlessly, pick up the pace or add a steeper grade.
By week four, two-hour sessions with 15 pounds should feel challenging but doable. Your boots should feel broken in, not painful. If you’re hitting these marks consistently, you’re ready to ramp up duration and difficulty in the next phase.
Weeks 5-8: Increasing Duration and Difficulty
By week five, you’re ready to push beyond your comfort zone. This phase bridges the gap between foundational fitness and trip-ready conditioning, and it’s where many hikers see the most dramatic improvements in their endurance and confidence on the trail.
Your training sessions should now extend to three to five hours, with a deliberate shift toward more challenging terrain. Seek out trails with sustained elevation gain, 500 to 1,000 feet of climbing works well, and rougher surfaces that force your stabilizer muscles to engage. This prepares your body for the uneven ground and sustained effort you’ll encounter on actual hiking trips.
Pack weight progression is critical during this phase. Follow this sequence to build safely without overloading your joints:
- Week 5: Add 5 pounds to your current pack weight (bringing backpackers to 20 pounds, day hikers to 15 pounds)
- Week 6: Maintain that weight while increasing hike duration by 30 minutes
- Week 7: Add another 5 pounds (backpackers now at 25 pounds, day hikers at 17-18 pounds)
- Week 8: Hold the new weight steady while tackling your steepest training route yet
If you’re training for a backpacking trip, you should be approaching 25-30 pounds by week eight. Day hikers and those planning shorter trips can cap their training weight at 18-20 pounds. The key difference: backpackers need to condition their bodies for multi-day loads, while day hikers benefit more from sustained duration at moderate weight.
Pay attention to how your body responds to the increased demands. Some soreness is normal, but sharp pain or persistent aches signal you’re pushing too hard. Scale back if needed, consistent training at a sustainable pace beats aggressive progression that leads to injury.
Weeks 9-12: Peak Conditioning
Weeks nine through twelve transform everything you’ve built into trip-ready performance. This is where your training mirrors the actual demands you’ll face on the trail.
Your hiking sessions now hit 6-8 hours, matching full trail days. Carry your complete trip weight during these sessions, 30 pounds for backpacking trips, 10-20 pounds for other types. Don’t approximate. Load your pack with the exact gear you’re bringing, positioned the way you’ll carry it. This isn’t just conditioning; it’s your final equipment shakedown to catch problems before you’re miles from the trailhead.
Seek out terrain that replicates your planned route. If your trip involves sustained climbs, train on similar grades. Rocky trails? Find technical ground. Consistency matters more than perfect matches, but the closer you get, the better prepared you’ll be.
During weeks nine through eleven, schedule back-to-back training days at least once per week. Hike Saturday and Sunday to simulate multi-day efforts and discover how your body recovers overnight with a pack on your back the next morning. Pay attention to hot spots, muscle soreness, and your energy level on day two, these patterns predict your trip experience.
Week twelve is your taper week. Cut volume by half but maintain intensity. One final 4-hour hike with full weight confirms you’re ready without compromising your legs before departure. Rest more, sleep well, and trust the work you’ve completed.
Adapting the Plan for Different Trip Types
The baseline 12-week plan targets multi-day backpacking trips, but you can adjust the intensity and pack weight based on your specific hiking goal.
For day hikes, you need less aggressive conditioning. Cap your training pack at 10-15 pounds and focus on building endurance for 4-6 hour outings rather than the full 8-hour sessions. You can compress the timeline to 6-8 weeks if you already have moderate fitness, spending more time on terrain variety than sheer duration.
Overnight trips fall between day hiking and extended backpacking. Train with 15-20 pounds and work up to 6-hour hikes, but you don’t need the back-to-back training days that simulate multi-day efforts. The standard 12-week schedule works well here with reduced pack weight.
High-altitude treks require additional cardiovascular capacity beyond the baseline plan. If you live at low elevation, add stair climbing or incline treadmill sessions to your weekly routine, and consider scheduling a practice hike at higher elevation during weeks 9-12 to test your acclimatization response.
Technical terrain with scrambling or via ferrata sections demands upper body and grip strength that standard hiking training won’t build. Add pull-ups, dead hangs, and core work twice weekly, and practice on similar terrain during your later training hikes to develop confidence with exposure.
Supplemental Training to Build Hiking-Specific Strength
While trail time builds endurance, targeted strength work accelerates your progress and protects you from injury. Focus on exercises that mirror hiking’s demands rather than generic gym routines.
Leg strength matters most. Squats develop the quads and glutes you’ll use on every climb, while walking lunges replicate the uneven stride of trail terrain. Step-ups onto a bench or sturdy box directly simulate uphill hiking, add a weighted pack for weeks 5 and beyond. Aim for two 20-minute sessions per week, prioritizing controlled movement over heavy weight.
Core stability prevents the lower back pain that plagues hikers carrying loaded packs. Planks, side planks, and dead bugs strengthen the muscles that keep your torso stable under a shifting load. Thirty seconds per exercise, repeated three times, fits easily into rest days.
On days when you can’t hit the trails, maintain cardiovascular fitness through activities that spare your joints. Cycling builds leg endurance without impact stress. Stair climbing mimics elevation gain perfectly, find a tall building or use a gym machine. Rowing engages your entire posterior chain, the muscle groups that power you uphill.
Don’t skip mobility work. Hip flexor stretches, calf stretches, and ankle circles for five minutes after each training session keep your stride fluid and reduce injury risk. Tight hips and ankles are the most common biomechanical limiters in novice hikers.
Testing Your Readiness: How to Know You’re Prepared
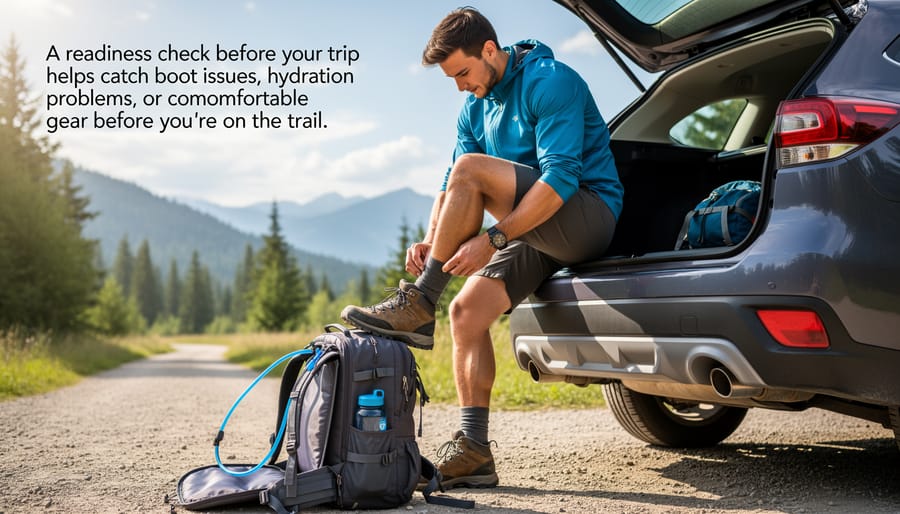
You need concrete proof you’re ready before you hit the trail, not wishful thinking. Two weeks before your departure date, schedule a full-duration practice hike that mirrors your actual trip conditions as closely as possible. Load your pack to the exact weight you’ll carry (30 pounds for backpacking trips, 10-20 pounds for day hikes), wear your broken-in boots, and tackle terrain with similar elevation gain and difficulty to what you’ve planned. This dress rehearsal reveals weaknesses in your conditioning and gear setup while you still have time to fix them.
During your test hike, monitor how your body responds at different checkpoints. You should maintain a conversational pace throughout without gasping for air, complete the full distance without severe muscle cramping, and finish with energy in reserve rather than limping to the endpoint. Check your feet for hot spots or blisters every two hours, since any friction points will multiply over multiple days on the trail. If you’re planning a multi-day trip, pay attention to how you feel the morning after, you should be sore but functional, not immobilized.
Your practice hike should confirm these readiness indicators:
- You complete the target duration without stopping more than planned rest breaks
- Your heart rate recovers to normal within 10 minutes of stopping
- No new blisters form and existing calluses hold up under full pack weight
- You consume and retain adequate water and hiking foods without digestive issues
- Your pack fits comfortably with no rubbing or pressure points after hours of wear
- You feel confident rather than anxious about your upcoming trip
If you fall short, be honest about the gap between your current fitness and trip demands. Pushing through inadequate preparation leads to miserable days on the trail or worse, injury far from help. Consider scaling back your route to match your actual conditioning, choosing a shorter trail, reducing daily mileage targets, or adding an extra rest day. There’s no shame in modifying plans; experienced hikers know that matching ambition to ability makes for better trips than suffering through something beyond your current capability.
Common Training Mistakes and How to Avoid Them
I’ve watched countless hikers sabotage their training without realizing it. Here are the mistakes that’ll derail your preparation and the straightforward fixes that actually work.
Ramping up distance or intensity too fast leads the list. You’re excited about your trip, so you jump from two-hour walks straight to six-hour slogs with a loaded pack. Your knees, ankles, and connective tissue can’t adapt that quickly. The fix: follow the 12-week progressive plan structure. If you’ve missed weeks, extend your timeline rather than cramming doubled workload into shortened time.
Skipping rest days creates cumulative fatigue that masquerades as poor fitness. Your body builds strength during recovery, not during the hike itself. Schedule at least one full rest day between training sessions, and take two if you’re over forty or feeling persistently sore.
Training exclusively on flat terrain when your trip involves serious elevation gain sets you up for brutal reality checks. Flat-ground cardio builds your engine, but it doesn’t prepare your quads for descents or your calves for sustained climbing. The fix: seek out hills, stadium stairs, or even parking garage ramps for at least one weekly session. If you live somewhere genuinely flat, load a treadmill to maximum incline or do high-rep step-ups onto a sturdy bench.
Breaking in boots during the trip itself guarantees blisters. Wear your actual hiking boots for every training walk, starting with short sessions and building up. If hot spots develop during training, address them now with different socks, lacing techniques, or boot modifications.
Carrying the wrong pack weight during training leaves you underprepared or overtrained. Match your training load to your trip type: 30 pounds for backpacking, 10 to 20 for day hikes and other outings. Don’t train with an empty pack and expect to handle trip weight comfortably.
Failing to test your nutrition and hydration strategy means experimenting with your gut on the trail. Practice eating and drinking on the move during your longer training hikes. Figure out now what foods settle well, how much water you actually need per hour, and whether your chosen snacks stay palatable after bouncing in your pack for six hours.
Frequently Asked Questions
How long does it take to get in shape for hiking?
For most people starting from average fitness, expect to train for at least 12 weeks before a multi-day backpacking trip. Day hikes require less preparation, typically 4-6 weeks of consistent training will get you comfortable on moderate trails, though you can start enjoying easier day hikes much sooner.
Can I train for hiking without access to trails?
Absolutely. Use stair climbing, treadmill walking at an incline, or outdoor stadium stairs while wearing a weighted backpack. Cycling and rowing also build the cardiovascular base you need, though you’ll want at least a few practice hikes before your trip to test your boots and gear.
What if I can only train twice a week?
Two quality sessions per week can still prepare you for hiking, though you’ll want to extend your training timeline to 16-20 weeks instead of 12. Make each session count by gradually increasing duration and pack weight, and consider adding short walks on other days to maintain consistency.
Do I need to train for day hikes?
It depends on the hike’s length and difficulty. Easy trails under 5 miles with minimal elevation gain don’t require specific training for most moderately active people. Longer day hikes with significant elevation, rough terrain, or those exceeding 10 miles benefit from 4-6 weeks of preparation to ensure you’ll enjoy the experience rather than just survive it.
How do I maintain fitness between hiking seasons?
Keep up your cardiovascular base with activities you enjoy, cycling, swimming, running, or gym workouts work well. Aim for 2-3 cardio sessions per week plus leg-strengthening exercises. You’ll retain most of your hiking fitness this way and can ramp back up to trip-ready conditioning in 4-6 weeks instead of starting from scratch.
The beauty of hiking-specific training is its flexibility. You don’t need perfect conditions or access to wilderness areas to build the fitness that makes trails enjoyable. Your body adapts to the progressive stress you place on it, whether that’s climbing apartment building stairs with a loaded pack or spending weekends on local trails. The key is consistency and gradual progression, the same principles that make the 12-week plan effective work at any timeline or frequency you can manage.
If you’ve missed your ideal training window or can’t fit in three sessions per week, don’t cancel your trip. Adjust your hiking plans to match your actual fitness level instead. Choose shorter daily distances, plan more rest days, or select less demanding terrain. Honest self-assessment prevents the misery of being underprepared, and a slightly easier trip you enjoy beats an ambitious itinerary that becomes an exhausting ordeal.
The difference between dragging yourself up a trail and truly enjoying the experience comes down to preparation. When you follow a structured training plan, hiking stops being a test of survival and becomes what it should be: an adventure you can savor from the first step to the last.
The 12-week progressive approach works because it mirrors how your body actually adapts. Starting with short sessions and a light pack, then building systematically to full-day hikes with trip weight, gives your muscles, joints, and cardiovascular system time to strengthen without breaking down. You’re not just getting fitter, you’re becoming a hiker.
Start your training now, and you’ll reach the trailhead confident rather than anxious. You’ll notice scenery instead of counting steps. You’ll finish strong instead of limping back.
The right gear supports every training session. Our detailed reviews help you choose boots that won’t destroy your feet, packs that distribute weight properly, and layers that keep you comfortable through changing conditions. Good equipment and solid conditioning work together, one without the other leaves you underprepared.
Twelve weeks from today, you could be ready for the hike you’ve been putting off. The only question is whether you’ll start.